Learn how to install and configure Polybar to create a Linux status bar that gives you complete control over what it displays.
The FOSS Force Linux App of the Week — Polybar
If you’d like to add a customizable status bar to your desktop and your current desktop environment doesn’t allow for such configurations, give Polybar a try.
No matter what distro you use, Linux systems are highly customizable. I always tell people that if there’s an aspect of Linux that you don’t like… change it. Want a different kernel… change it. Want to use a different desktop environment… change it. In fact, there’s hardly an aspect of Linux that you can’t change.
There is one thing, however, that can become a sticking point. Some desktop environments don’t allow as much customization as others. For example, Xfce is incredibly customizable, whereas Gnome isn’t (without the help of extensions).
If you have one of those desktop environments that isn’t as customizable as others, you might wonder if you’d need to hop to a different distribution or DE to satisfy that need to tweak. Not necessarily. You could add a tool like Polybar.
Inside Polybar
Polybar is a highly customizable status bar you can install on just about any Linux distribution. This bar makes it possible for you to configure the look as well as what it contains, its size, cursor click/scroll actions, and more. Polybar is a brilliant little app that makes extending the feature set of your desktop easy. I like to think of Polybar as the Conky of status bars.

Some of the Polybar features include:
- Systray icons
- Window title
- Audio playback controls and status display for MPD
- Workspace and desktop panel for tiling window managers such as bspwm and i3
- Workspace module for EWMH-compliant window managers
- Keyboard layout and indicator status
- CPU and memory load indicator
- Battery display
- Network connection details
- Backlight level
- Date and time label
- Time-based shell script execution
- Command output tailing
- User-defined menu tree
- Inter-process messaging
There is, however, one thing you should know about Polybar before we continue. Although Polybar is a GUI application, its configuration is handled entirely via a text file. There is no GUI for customization; so, if you aren’t comfortable configuring an app from a text editor, you might give Polybar a pass.
If, however, you don’t mind editing a text file to customize a desktop app, read on, MacDuff.
Installing Polybar
Polybar is fairly simple to install on most Linux distributions. Here are some examples of commands to install the app:
- Ubuntu –
sudo apt-get install polybar -y - Debian –
sudo apt -t bullseye-backports install polybar - Arch –
sudo pacman -S polybar - Fedora –
sudo dnf install polybar
Once installed you will want to add the polybar command as a startup app for your DE of choice. How this is done will depend on your desktop environment. For example, on a KDE Plasma-based desktop, you can go to System Settings>Autostart, and add Polybar.

Configuring Polybar
The Polybar configuration file is found at /etc/polybar/config.ini. I wouldn’t suggest editing that file directly and, instead, first making a copy of the file with the command:
sudo cp /etc/polybar/config.ini /etc/polybar/config.ini.bak
Once you’ve done that, open the file for editing with the command:
sudo nano /etc/polybar/config.ini
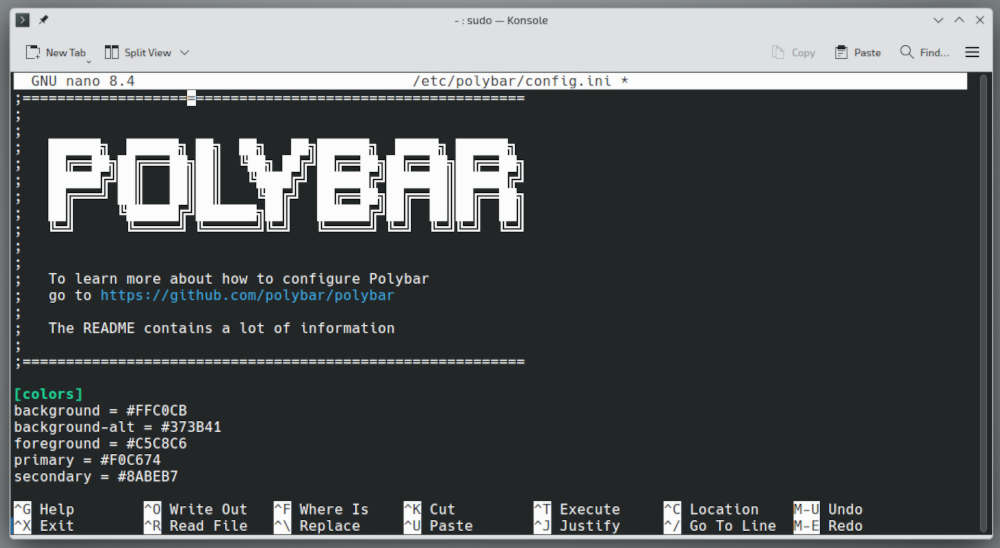
The configuration file is laid out in typical INI fashion and might seem familiar to anyone who’s configured the smb.conf file for configuring Samba. For instance, at the top of the file, you’ll see the following block:
[colors]
background = #FFC0CB
background-alt = #373B41
foreground = #C5C8C6
primary = #F0C674
secondary = #8ABEB7
alert = #A54242
disabled = #707880
You can also make Polybar transparent by adding XX (where XX is the amount of transparency) in front of the hex for the background. For example, if I wanted a totally transparent bar, it would look like this:
[colors]
background = #00FFC0CB
background-alt = #373B41
foreground = #C5C8C6
primary = #F0C674
secondary = #8ABEB7
alert = #A54242
disabled = #707880
If you wanted a 50% transparent bar it would be #50FFC0CB
There are several blocks throughout the file, such as [bar/example], [module/systray], [module/xworkspaces], [module/xwindow], [module/filesystem], [module/pulseaudio], [module/xkeyboard], etc. Each of these modules customizes a specific portion of Polybar. Each module offers different customizations, so you’ll want to pay close attention to each.
There is a wiki dedicated to customizing Polybar, but I will say that it does lack some detail. Fortunately, there’s another Polybar wiki that is much more helpful. I would highly recommend you comb through that to learn more about the config.
One very cool thing about Polybar is that you can create configurations for multiple bars. If you want to do that, you should first create a user config folder with the command:

mkdir ~/.config/polybar
Create a new config.ini file in that folder or copy the one from /etc/polybar. In that file, you could define a top bar and bottom bar, like so:
[bar/mytopbar]
options = values

[bar/mybottombar]
options = value
You would then add all of the necessary customizations to each section.
You can even create your own modules for Polybar with the following syntax:
[module/MY_MODULE_NAME]
type = MODULE_TYPE
option1 = value1
option2 = value2
Let’s say you want to create a module for date and time. That module could look something like this:

[module/datetime]
type = internal/date
interval = 1.0

date = "%m-%d%-%Y"
time = "%H:%M"

label = "%date% - %time%"
Polybar is a great addition to any desktop where more information and interactive modules might be necessary. Give Polybar a try and see if it doesn’t elevate your desktop.
Things I like about Polybar |
Things I don’t like about Polybar |
|---|---|
|
|

Jack Wallen is an award-winning writer for TechRepublic, ZDNET, The New Stack, and Linux New Media. He’s covered a variety of topics for over twenty years and is an avid promoter of open source. Jack is also a novelist with over 50 published works of fiction. For more news about Jack Wallen, visit his website.