Moving away from VirtualBox doesn’t have to be complicated. Jack Wallen walks you through installing virt‑manager and spinning up your first VM with KVM.
The FOSS Force Linux App of the Week — Virt-Manager
I’ve been using VirtualBox for what seems like forever. I can’t even begin to tell you how many virtual machines I’ve spun up over the years with VirtualBox.
Countless, I say, COUNTLESS.
But, alas, that relationship has been of a love/hate nature for some time now. It seems like at any given time I could blink, sneeze, or break wind and VirtualBox would come crashing down. Or not start. Or not allow me to create a VM.
I’d purge the install, re-install, and find myself in the same situation. I’d add and remove kernel modules, only to experience the same issues.
So, today I opted to begin the migration away from VirtualBox to an alternative… KVM/Virt-Manager.

What is KVM/Virt-Manager?
KVM stands for Kernel-based Virtual Machine and is built directly into the Linux kernel. Because of that, Linux systems can function as powerful hypervisors to run isolated virtual machines with near-native performance.
KVM is a command-line tool, which is where Virt-Manager comes into play. It supplies a GUI front-end for KVM, and I’ve found it to be just as easy to use as VirtualBox. As a bonus… it’s more reliable.
Virt-Manager is a lightweight GUI desktop application for Linux that greatly simplifies the creation, running, and managing of virtual machines and containers. Virt-Manager primarily uses KVM, but is also supported by Xen and LXC. The UI is intuitive and allows you to monitor performance, manage networks and storage, and access guest controls. In the end, Virt-Manager is a vastly simplified way of working with KVM.
Both KVM and Virt-Manager are open-source, with KVM using the GNU General Public License version 2, and Virt-Manger released under GPLv2 or later.
Installing Virt-Manager
You won’t need to install KVM because it’s included in the Linux kernel. Virt-Manager, on the other hand, has to be installed.

This tool can be installed on most Linux distributions. Here are the commands for doing so on the more popular distros.
- Ubuntu/Debian-based distributions:
sudo apt-get install virt-manager -y - Fedora-based distributions:
sudo dnf install @virtualization - Arch-based distributions:
sudo pacman -S qemu virt-manager libvirt dnsmasq bridge-utils edk2-ovmf iptables-nft libguestfs - openSUSE-based distributions:
sudo zypper install libvirt virt-manager qemu-kvm
It’s also available as a Flatpak under the name Virt Machine Manager, but you’re generally better off installing it the old-fashioned way via your distribution’s package manager, as Flatpak’s sandboxing can introduce complications.
Once you have everything installed, you’ll then need to take care of a few things. First add your user to the libvirt group with the command:
sudo usermod -aG libvirt $USER
After that, make sure your user has access to the libvirt socket with:
sudo chown $USER:$USER /var/run/libvirt/libvirt-sock
Restart libvirt with:
sudo systemctl restart libvirtd
Log out of your desktop and log back in to make sure the changes take effect.
Creating Your First Virtual Machine
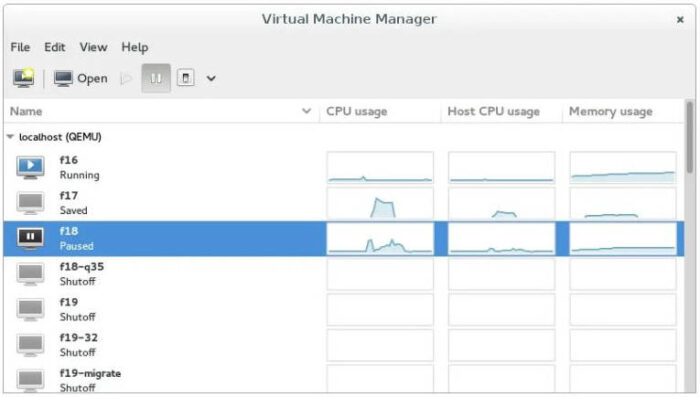
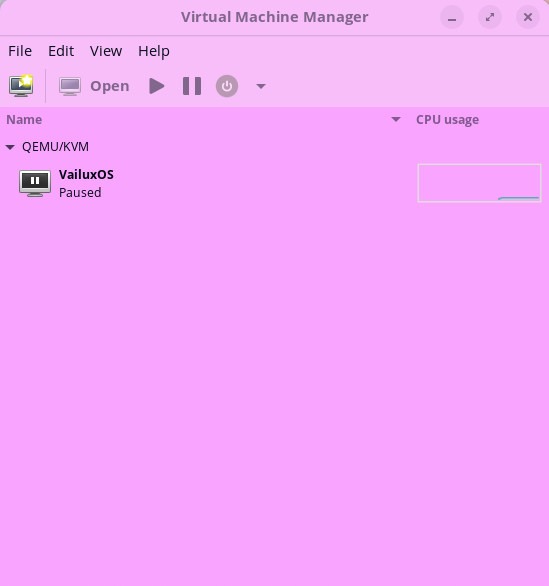
Open Virt-Manager from your desktop menu, and you’ll be greeted by the main window.

Open the new VM Wizard by clicking the new icon or File > New Virtual Machine. When the wizard opens, you’ll want to stick with the default for step 1, Choose how you would like to install the operating system.
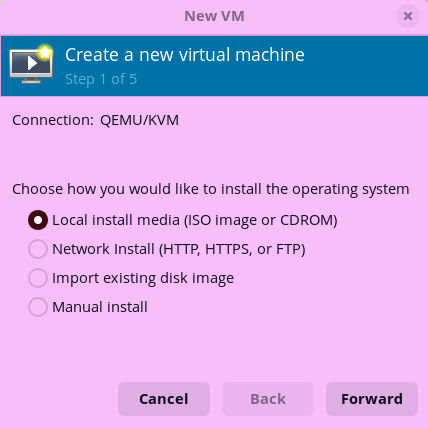
Click Forward, and you’ll then need to locate the ISO you want to use for the virtual machine.
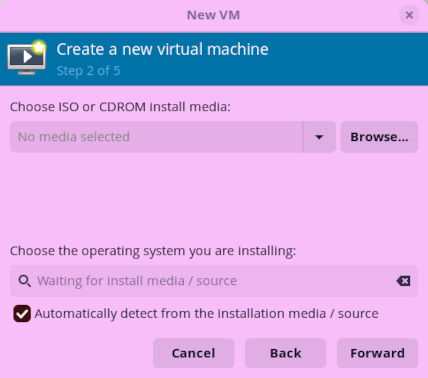
Click Browse and then, in the resulting window, click Browse Local. Locate the ISO you want to use. If Virt-Manager doesn’t automatically detect the OS, deselect “Automatically detect from the installation media,” and then type “Linux.” A pop-up list will appear, where you can select the distribution you’re using.
I’ve found in several instances that the distribution I want to add isn’t listed (even Debian isn’t there… wut?). If your distro isn’t listed, select Generic Linux 2024 and click Forward. If you receive an error about the emulator not having permission for the path, click Yes to give it permission.
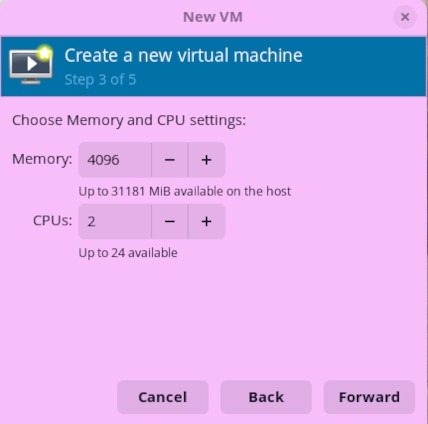
Next, give it whatever amount of memory and number of CPUs you wish and click Forward.

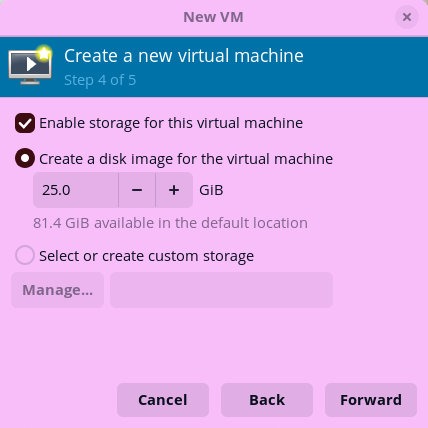
The next page of the wizard allows you to configure the size of storage you want to give the VM. Make sure to configure this accordingly and click Forward.
Finally, give your VM a name and click Finish.
You will find yourself at the main Virt-Manager window, where you can select the new virtual machine, and start it.
One Caveat
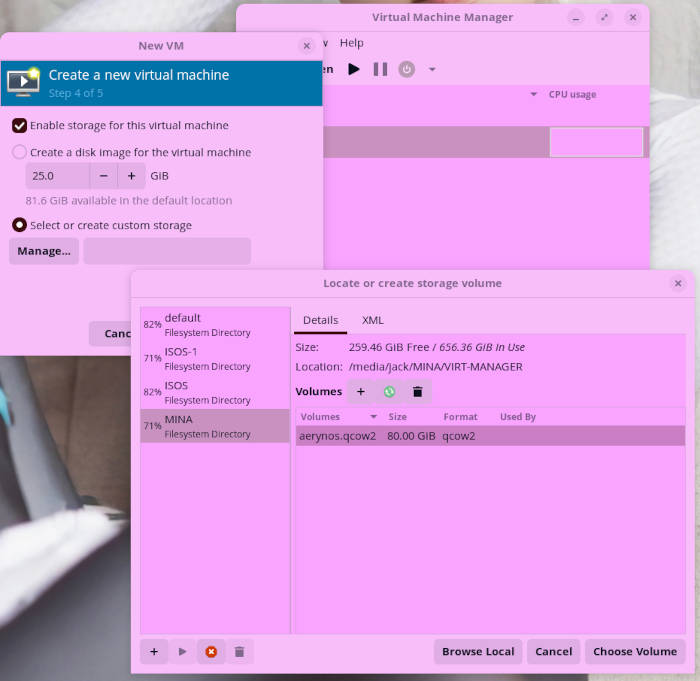
KVM/Virt-Manager uses /var/lib/libvirt/images/ for storage, which can gobble up your internal drive. If you want to avoid that, attach a secondary drive (one that’s fast with a USB 3.2 cable) and then create a new storage pool there.
To create a storage pool, make sure to check Select or create custom storage in step 4 of the wizard, and click Manage. This will open the storage manager, where you can create a new storage pool (bottom left +) and then create a new volume.
I’ve found KVM/Virt-Manager to be much more reliable than VirtualBox. If you find VB makes you want to pull out your hair, I would recommend giving this combo a try.
Things I like about Virt-Manager… |
Things I don’t like about Virt-Manager… |
|---|---|
|
|

Jack Wallen is an award-winning writer for TechRepublic, ZDNET, The New Stack, and Linux New Media. He’s covered a variety of topics for over twenty years and is an avid promoter of open source. Jack is also a novelist with over 50 published works of fiction. For more news about Jack Wallen, visit his website.


Interesting tint on some of those windows in your screenshot.
There are quite a few different front ends to KVM. cockpit-machines is pretty darn close to usable these days although maybe not exactly in feature parity with virt-manager… but some folks might like it better.
It`s easy in gnome. Just install gnome boxes
Some nitpicking but KVM is not a “command-line tool”: it is a kernel module enabling interaction with the system’s CPU virtualization extensions (Intel VT-x/AMD-v) to accelerate same architecture-virtualization.
You probably meant libvirt instead, or perhaps even QEMU? In any case, without those virt-manager would be unable to communicate with KVM at all.