Dammit, Clement Lefebvre, you and your team at Linux Mint have gone and done it. Y’all, and the folks at Xfce too. Why couldn’t you just leave well enough alone? I was perfectly fine and dandy with Maya and now you’ve gone and ruined it by coming out with something five times better. Thanks for ruining my Saturday. Thanks a lot.
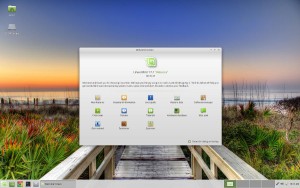
Click image to enlarge.
When the folks at Mint released a new LTS Xfce version (Qiana) in June of last year, followed by another LTS (Rebecca) in January, we didn’t much care. We were more than happy with Maya, and following the age old philosophy of “if it ain’t broke, don’t fix it,” we decided to stay the course and keep using what we had until its sunset year arrived. As far as I was concerned, although approaching obsolescence, Maya was damned near perfect. How much better could the latest and greatest be?
However, you might notice that I write about Maya in the past tense. I confess. I killed her.
Early this year we were gifted a new-to-us Dell laptop, a sweet little 32 bit machine with the best sounding and loudest laptop speakers we’ve ever heard, making it the obvious candidate to be the machine we’d use for watching Netflix, hardworking folks that we are. So I downloaded and installed Rebecca, loaded it up with Google Chrome (the easiest way to use Netflix in Linux) and now fire it up late at night, when the moths and I are the only ones around, to watch The Fall, The Killing or Lily Tomlin drinking peyote out of a mason jar on Grace and Frankie.
Guess what? I quickly discovered that as good as Maya is, Rebecca is a quantum improvement, with many new functions and increased ease of use. In fact, I found myself running to the Rebecca laptop during office hours to handle chores such as formatting thumb drives and creating bootable ISOs. So I spent Saturday afternoon and evening downloading Mint twice — both in its 32 bit and 64 bit incarnations — and upgrading both our HP 32 bit desktop and our Gateway 64 bit laptop.
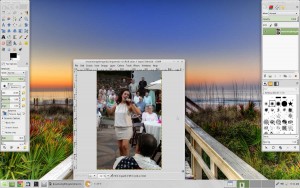
Click image to enlarge.
OMG! Linux Mint Xfce Edition has turned me into one of those fangirls I so dislike.
Upgrading Mint
For newer Linux users, I’m going to explain the steps I took for this upgrade (oldtimers can skip the next few sections), hoping this will be a help to those wanting to upgrade their machines, whether from an earlier version of Mint or from any other distro.
To my way of thinking, when I’m moving from one release to another, I like to do a clean install. Although most distros offer some kind of upgrade path, I think it’s a good idea to occasionally do a complete install from scratch — to fix any misconfigurations that might have occured over time if for no other reason. Besides, installing a clean version of a Linux distro is easy peasy these days — sometimes easier than any upgrade path baked into your distro.
Backing up the Home directory
No matter what distro you’re currently using, you will most likely find more than one backup application installed, and any one of them will do the job for you, some better than others. However, in this day and age of automatically mounted thumb drives, I no longer see any need to use a backup program. I just insert a thumb drive into a port, open up a file manager and copy everything from the home directory I’m going to want to keep on the new distro.
In my case, this meant copying everything from the Documents and Pictures directories only. I don’t ever save anything to the desktop, I don’t have any videos or music stored locally, and my downloads folder is filled with nothing but gigantic install files from distros I’d downloaded for testing and will never need again. If you use Firefox, you’ll also want to backup your settings and can find information on how to do this on Mozilla’s site.
Click image to enlarge.
Downloading and installing Linux Mint 17.1
First you’ll need to download Linux Mint 17.1 from Mint’s Rebecca download page, choosing whether you need the 32-bit or 64-bit version (there’s an article on How-To Geek explaining how to find out if you’re not sure). The Mint download page will also let you choose versions with desktop environments other than Xfce if you wish. After making your choice, save the download to your Downloads directory.
Now you’re ready to create a bootable USB drive using Unetbootin or some other utility designed to create bootable drives from downloaded ISO files. Most likely, your distro will already have something installed for this purpose (I used Mintstick, which I now prefer after years of using Unetbootin). If you don’t find anything installed, install Unetbootin either through your software manager or the command line. Make sure that you don’t use the same storage device that you used to backup your Home directory, as making the bootable drive will erase everything already on the thumb drive.
Click image to enlarge.
Now all you have to do is shut down your computer, stick your thumb drive into an USB port and hit the power button. You’ll soon be greeted with a screen offering you some boot options, which you can ignore. In ten seconds or so, your machine will boot automatically into a “Live” image of Linux Mint Xfce running from the thumb drive you created.
After you’re up and running live, make sure you can connect to the Internet. If you can, you’re ready to bite the bullet and click the Install button, located in the upper left part of the desktop. Right away you’ll be clicking through some screens relating to time zones, languages, etc.
To partition or not to partition…
Early on in the install, the Mint installation program will name all of the operating systems that are on your computer and offer you three options: a) Share Linux Mint Rebecca with what’s already on your machine. b) Wipe whatever’s on your machine and install Rebecca as your standalone OS. c) Something else. Unless you have experience with disk partitioning, you should’t choose the last option.
Click image to enlarge.
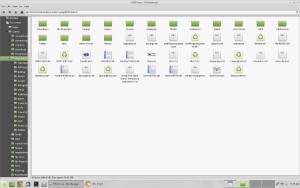
Immediately after choosing to share the new install with whatever’s already on the computer, you’ll be taken to an easy to use partitioning tool where you can reduce the size of the old distro down to just above minimum, leaving the rest of the disk available to the new distro. This screen offers a graphical map of your drive, which is actually a slider, indicating the space that will be allocated to each distro after partitioning. By default, the allocation will be about 50/50.
By moving the slider all the way in the direction of the already installed distro until it stops, you can determine the amount of space being used by that distro. In my case, the Maya install was using about 16GB, so using the slider, I allocated it 20GB, giving it a little breathing room, which left well over 200GB available for Rebecca.
If you choose the second option, to wipe everything and install Mint 17.1 as a standalone distro, you’re pretty much done with the partitioning process and your entire hard drive will be reformatted after you click through a warning that the process is irreversible and will wipe everything on your machine
Click image to enlarge.
After partitioning your drive, you’ll want to have a book or some other distraction handy, as your computer will be busy installing Rebecca for the next 20 minutes or so, depending on your Internet connection speed. You’ll want to stay close, however, as you’ll eventually be prompted to create a user account and decide on whether to encrypt your entire drive, your home directory, or nothing at all.
My rule of thumb on encryption? For a desktop, as long as it’s not going to have any extremely sensitive data on board, I don’t encrypt it at all and set it to boot completely without prompting for a username or password, so I can hit the power button, walk away from the computer to grab a cup of coffee or something and find it ready for action upon my return. Of course, this means never letting a browser store a password for the likes of online banking or PayPal, which I don’t do under any circumstance anyway. For a laptop, which is easily stolen, I encrypt everything.
If you do encrypt, make sure you choose a strong password. But beware: If you forget the encryption password, unless you know someone at the NSA, you’ll never recover your data — and probably not even then.
After that, you’re done. It’s time to hit Restart, pull your USB device and boot from the hard drive. In other words, it’s time to take your shiny new Linux installation for a spin.
A few things to do after first boot
Click image to enlarge.
Usually, the first time you run the updater you’ll be presented with a long list of fixes that’ll take a half hour or so to download and install. You won’t need a book, though, as your computer will still be available to you.
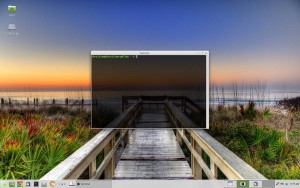
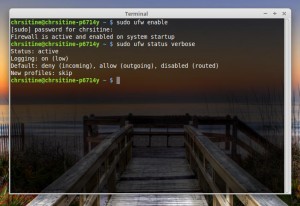
The next thing you’ll want to do is to enable the firewall, which is not enabled by default in Mint. In past versions, this could be done through the GUI, but evidently that option is no longer available. Not to worry, this is easy to do via the command line. Simply open the terminal and type “sudo ufw enable” without the quotation marks. This will enable the firewall, configured to default settings which are usually sufficient. To make sure the firewall is up and running, type “sudo ufw status verbose” and make sure that the lines returned includes the phrase “deny (incoming).” To disable the firewall, type “sudo ufw disable”.
Click image to enlarge.
One of the reasons I like the Xfce desktop is because it’s not only relatively lightweight, therefore pretty easy on system resources, but it’s fairly configurable too. Here are some hints to get you started:
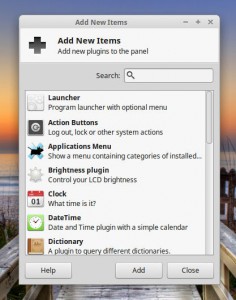
To place applications in the panel for easy access, simply right click in the panel to bring up a context menu, hover over the word “Panel”, select Add New Items, and then Launcher. An empty launcher will appear on the right side of the panel. Right click on it and you can add an application. You can then place the launcher wherever you want on the panel by right clicking and selecting Move.
You’ll pretty much need to add a separate launcher for each application if you want to see separate icons for each application. However, you can create launch groups (maybe grouping all of your browsers together) by placing several applications within a single launcher. In this case, only one icon will show up on the panel until you expand it by clicking an arrow next to the icon, revealing the other applications within that launcher. You can also choose which icon in a group you wish to display by default on the panel — the one at the top of the list displays by default.
Icons are placed on the desktop in much the same way: Right click anywhere on the desktop and choose Create Launcher. Type the name of the application to which you’d like the application to point, select Create, and you’re done. As far as I can tell, only one application can be included in each desktop launcher.
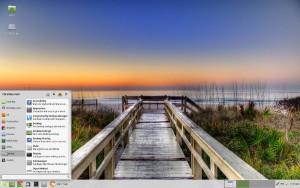
To change the wallpaper from Mint’s default, in the menu go to Settings>Desktop, where you’ll find many images from which to choose. Linux Mint Xfce also comes preloaded with lots of screensavers, with plenty of options on how to use them. In the menu go to Settings>Screensavers.
A couple of recommended Xfce applets
Xfce comes with many applets you can use to enhance your desktop experience. All applets are applied the same way as Launcher (which is also an applet), by right clicking in the panel and selecting the applet. The applet can then be moved by right clicking the applet and clicking Move. Although I usually eschew whistles and bells, there are a couple of applets I find useful and recommend that you investigate.
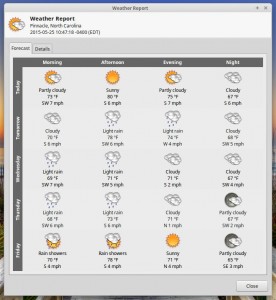
Click image to enlarge.
The applet automatically preconfigures to your location. However, it’s easy to change the location (by right clicking and selecting Properties), in case it guessed incorrectly or if you need to check the weather in another region.
Dictionary: As a writer, I’m constantly opening new browser tabs to check word usage and spelling (sometimes spellcheck can’t figure out what the hell I’m trying to type). With this applet, that’s not often necessary any longer. I just click on the open book icon, type the word in question into a text box and presto, I’m given definitions from various dictionaries, along with other information on how the word is best used. A very convenient time saver.
Is Linux Mint Xfce Edition right for you?
No one but you can decide whether Linux Mint is right for you. You know the way you use a computer, and what works best for you.
As for me, I require a computer that’s stable and easy to maintain. I also need an operating system that pretty much stays out of my way and doesn’t bother me. As something of a power user (I often have eight or nine programs open, with ten or more open tabs in one or more browsers), I also need a system that doesn’t bog down under a heavy load. For the past couple of years, the combination of Linux Mint and Xfce has worked well for me. I have no complaints. Maybe this combination will work well for you; maybe it won’t. You decide.
Thankfully, I’m no longer cursing Clem and the Mint team — or the folks developing Xfce for that matter. In my mind, I’ve made peace with them and can now thank them for doing the impossible by making my already fantastic Linux experience even better.
Dammit, I’m beginning to sound like Ken Starks. That’s okay, I guess. It gives me something new to cuss about.
You can help FOSS Force grow our coverage by making a contribution during our May Pledge Drive. If you enjoyed this article, please help us by making a contribution. Get all of the details on our Indiegogo campaign page.
Christine Hall has been a journalist since 1971. In 2001, she began writing a weekly consumer computer column and started covering Linux and FOSS in 2002 after making the switch to GNU/Linux. Follow her on Twitter: @BrideOfLinux





That’s okay Christine. You young people can use Xfce if you want. I’ve been on Rebecca’s KDE since it (she?) came out and enjoying it. I don’t usually have as many tabs open on a regular basis as you do and my ThinkPad doesn’t have to work as hard, but we get the job done. You’ll be old like me someday and enjoy the cushy life using KDE . 😉
@Uncle Ed I turn 64 tomorrow. How much further do I have to go to catch up with you?
KDE was my desktop of choice from when I first started using Linux in 2002 until I tried Enlightenment in January of 2013. I still like it a lot. It’s just no longer my desktop of choice.
I don’t use Linux Mint, but my teenage daughter is a Linux Mint user, albeit Cinnamon and not Xfce (I use Xfce, but on Korora). She hates when I say this, but this — cue the Neil Young — makes her my Cinnamon Girl. But anyway, over the years Clem Lefebvre and the folks at Linux Mint have done a great job of providing perhaps the most solid of Linux distros with little in the way of glitches or unhappy surprises that would send new users away.
Darling daughter is now on 17.1 Rebecca and she’s loving it.
Wow, Larry. You could write an article on that. Call it “Seventeen on Seventeed” or “Sixteen on Seventeen” or something like that. It would give you a chance to embarrass her good. 🙂
for the adventurer, install xfce 4.12 ia a ppa here:
http://www.webupd8.org/2015/03/install-xfce-412-in-xubuntu-1404-or.html
Enjoy!
Five more, Christine. But they’re good years.
I have been a Mint-XFCE user for a few year and I just installed it last week-end on my new office workstation. Two negative points.
First the disk partitioner. The plan was to have a first partition for boot and a second large partition for Luks+LVM with a small root and plenty was a standard setup with Luks and LVM on a small logical volume for / and plenty of space for futures partition. I do not remember if that was Luks or LVM but I could not figure out how to do that with their GUI. I finally choose the default installation with Luks+LVM but I had to reboot on the live install ISO to resize the root logical volume. The Debian partitioner is a lot easier an powerful.
Second, Mint has a Wisker menu that is mapped to the Win key (Super) to mimic the Windows behavior (ugly and stupid IMHO). This is really annoying because is becomes impossible to use the Win key for anything else. This causes a mess with keyboards that have hardwired shortcuts such as Win+L or Win-P to some of their multimedia keys.
Removing the wisker menu shortcut is not possible from the keyboard configuration dialog because it is hard-coded in system. The solutions either to remap the Win key from Super to Hyper or to edit a xml config file as root (but it may reappear with any update) or to remove the package providing that file (I think it was mint-artwork-xfce). I choose the last solution because the hacks used my mint on top of XFCE are IMHO buggy.
Apart from those two specific issues, everything seems to work fine.
I also removed the ‘Use mouse wheel on title bar to roll up the windows’ option in the Window Manager Tweak. Having a window rolled accidentally can be really annoying.
A sentence was messed up in my previous post: … The plan was to have a first partition for boot and a second large partition for Luks+LVM with a small root logical volume and plenty of unused space for futures partition ….
I also noticed a nice new feature I had never seen earlier (probably not Mint specific). The grub menu now provides the ability to enter the BIOS menu. That may be specific to UEFI because my earlier systems did not have that.
Try Artha as an alternative to the Dictionary applet. Should be in the Mint repo. Highlight a word in any program including your browser, type CTRL-ALT-w, and you get both a dictionary definition and a thesaurus discussion. Works fine offline!
To anyone who decides to do the upgrade from an Xfce 4.8 to 4.10 distribution (like, I would guess, to a recent Mint, though I haven’t done this on Mint, or from Debian Wheezy to Jessie), there are a couple of panel configuration oddities that you have to deal with.
When you first log back in (this won’t happen with newly created users, only to users who had logged into Xfce 4.8 before) all your panel items will be together on the left side of the panel, and any icon that is set to show up in a generic system tray will be missing, like a Network Manager icon. To fix these issues you have to add a “Separator” item to the panel, move it into position between the icons you want on the left and the right, and have it set to expand to fill available space (you should find that to be the default). You also have to add the item “Notification Area” to get icons that normally appear in a generic system tray back (this replaces an old item which I can’t remember the name of offhand).
I remember the fun I had figuring out how to get my Network Manager icon back (there is more than one way, but this is the easiest, most appropriate one) when I updated Ubuntu Studio to 14.04, so I’m sorry if I spoiled anyone’s fun.
I made the mistake of installing Mint XFCE 17.0 without keeping my Mint 13 system.
Bad mistake.
I had to re-install from scratch when 17 proved not to be suitable.
You may not be familiar with Hutber’s Law which states that “improvement means deterioration.” (Wikipedia.)
The new “improved” Catfish proved to be completely useless for my purposes, and the sound recorder widget is no more.
Both these are killers for me.
Learn from my mistake – DO NOT remove your old system when trying the latest and greatest, it may not be.
HTH